


[Photoshop Tutorial] How to Create a Panoramic Effect in an Instagram Carousel Post
If you've ever stumbled upon an Instagram carousel that features a "panoramic effect" but never knew how to recreate that yourself, you've come to the right place.
In this video tutorial, we explain the thought process and workflow behind creating that seamless panorama, which can be applied to so many different image file types other than just the example we used for this tutorial, like text graphics and photo collages.
Before we get started… make sure to subscribe to our newsletter to receive free tips and tutorials like this straight to your inbox 👇
STEP #1: MAP IT OUT.
Before I take you through the tutorial, I wanted to give you a quick overview of the thought process behind what I’ll be doing to create that “panoramic effect” with just one photo.
So, let’s say that this is your image. What you want to do is cut it up into equal parts but also make sure that those equal parts would ALSO fit within Instagram’s image size requirements. So, let’s say this is the photo: if you were to cut it up into 3 different pieces that are of equal sizes, this would create that panoramic effect by having this piece be image 1 of the carousel post, this piece be image 2, image 3, and so on within an Instagram carousel post.

But also, if you notice that in this landscape image example, if you cut it up into 3 parts, it produces portrait images that would typically be too tall for Instagram’s image size requirements. That’s why I’ll also be taking you through the process of also making sure to crop these sections so that they fit within Instagram’s aspect ratio image requirements (width of at least 1080 pixels with an aspect ratio between 1.91:1 and 4:5).
Step #2: Resize
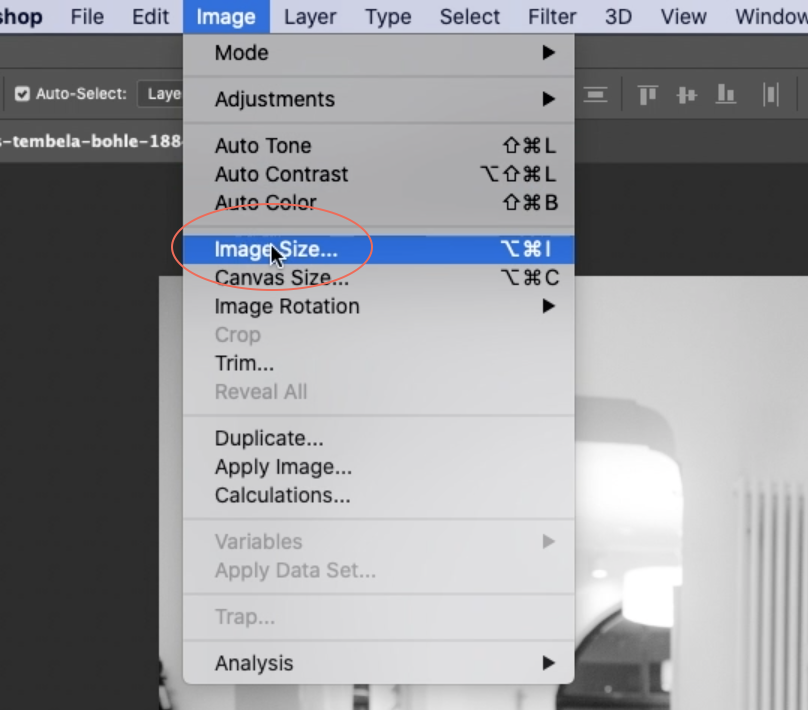
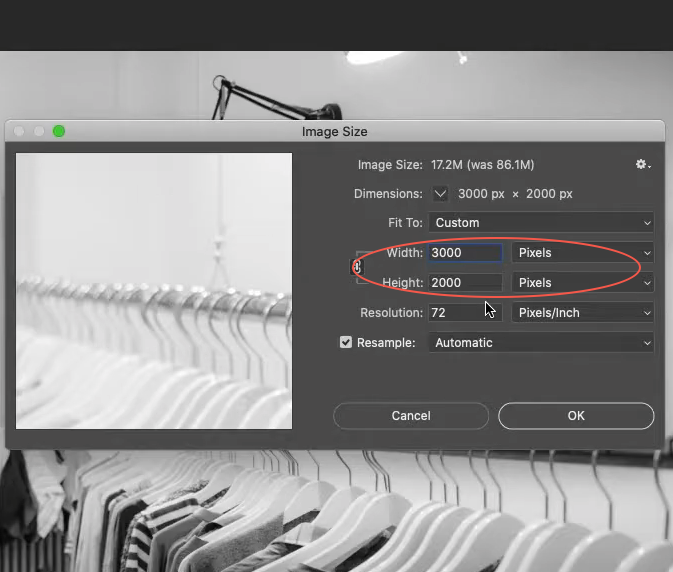
I’m using a free photo from Pexels for this exercise and the first thing I’m going to do is drop this image into Photoshop and resize it to 3000 pixels so it can be 3 times the image height, which I’ll decrease to 1000 pixels next to make 3 perfect squares for the carousel post.
STEP #3: UNLOCK AND CROP YOUR CANVAS SIZE
Next, I’m going to unlock this layer so that I can easily move around this image when I make the first crop to this canvas to the 1000 pixel height.
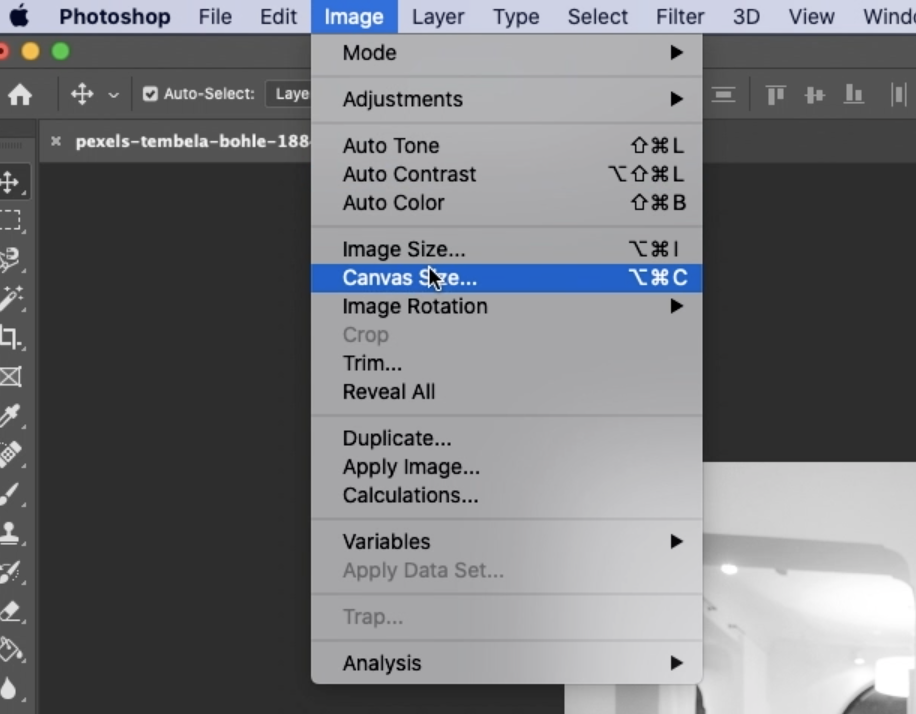
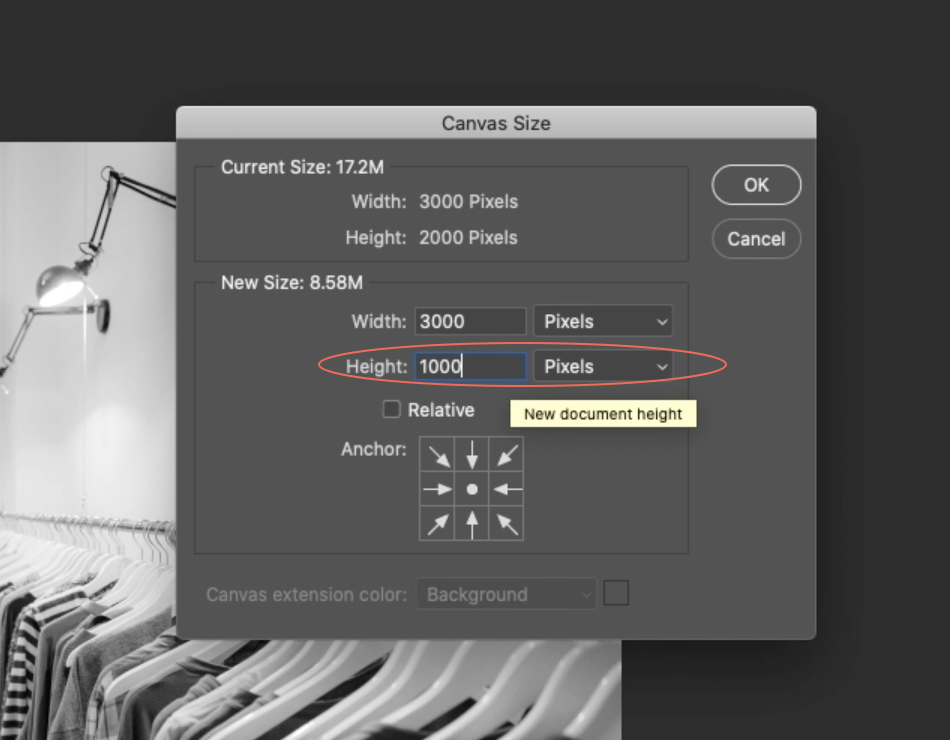
Now, let’s go over to the Image Menu and scroll down to Canvas size. Here, change the height to 1000 to achieve that 3000 x 1000 pixel canvas. If needed, move the image around until you achieve the desired crop within the new canvas size.
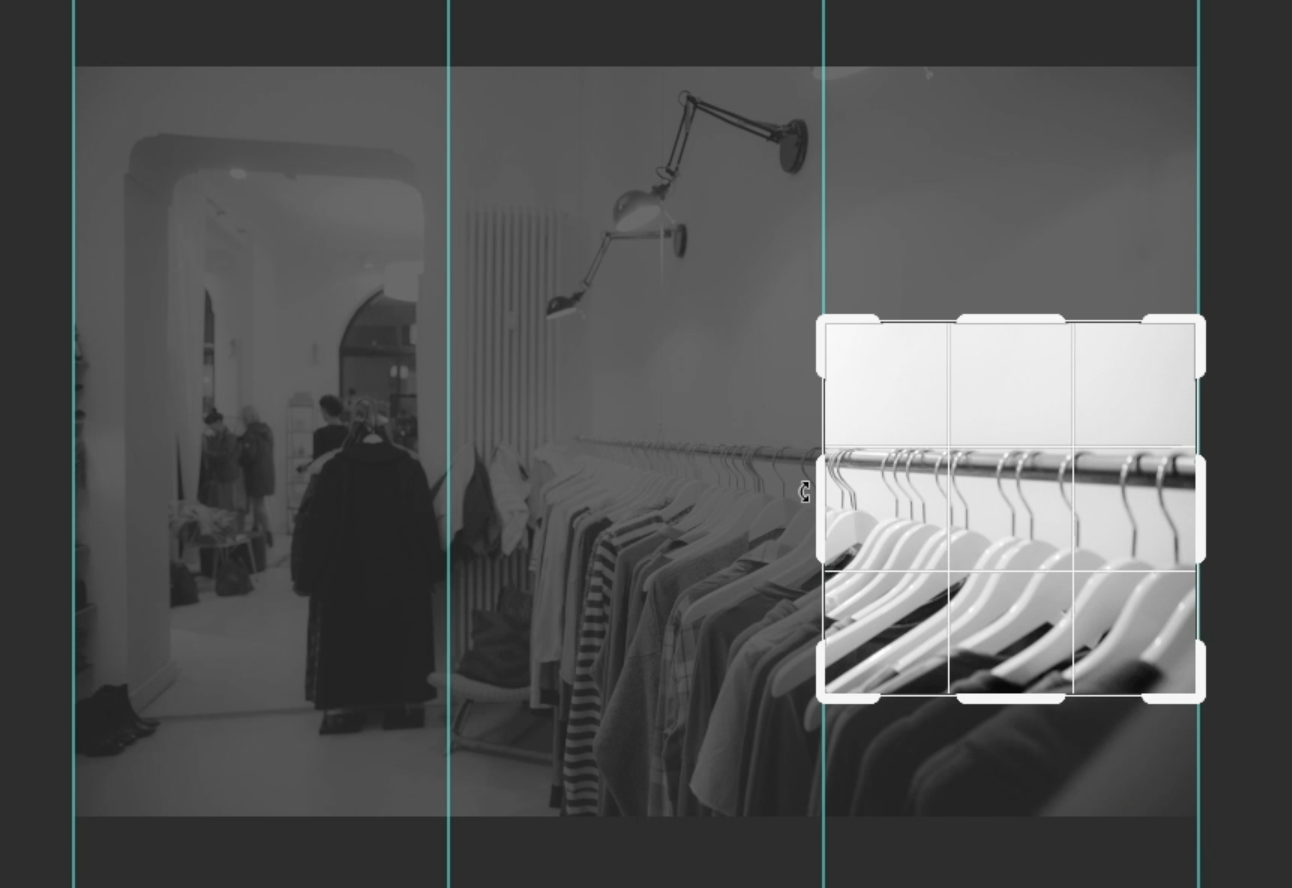
STEP #4: DIVIDE AND CONQUER
Go over to the ‘View’ menu > New Guide Layout to help you perfectly divide your image into equal parts. Since I’ll be cropping this image into 3, you just set the column number to 3, and set the gutter to 0 pixels. You can also uncheck “rows” since we won’t be needing that for this exercise. Hit ‘okay’ when you’re done.
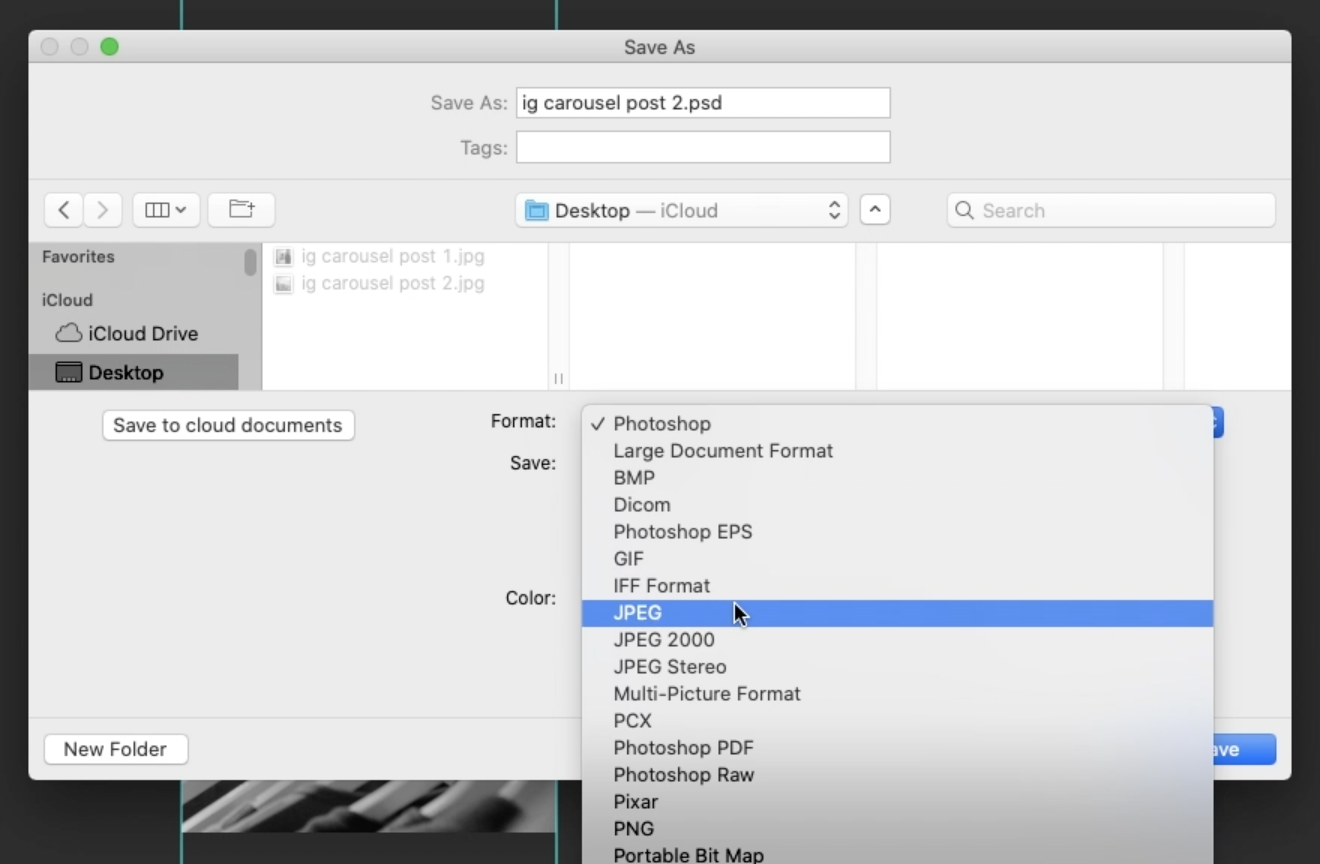
And now it’s time for our final cropping into 3 separate images! So go to the crop tool, and drag your crop to the first section according to the guidelines you created, crop, and save with a clear naming structure so that you can keep your new images organized. Repeat for the rest of the sections of your image.
And you’re done! We use Sprout Social, a social media scheduling software, for our client social media management, which allows users to easily preview drafted posts. Feel free to upload it into any other software you like and preview it to make sure it looks good to go.
Before you leave, don’t forget to join our newsletter to receive more free tips and tutorials like this straight to your inbox. 👇